
Sync can be accessed using a web browser or through the Sync Desktop App
Access through the web browser
- Open your web browser
- Navigate to the Sync.com website
- On the top-right corner, click “Sign In”
- Enter your email (username) and password
- Click Sign-in
Access through the desktop app
For Windows:
- Download the installer to your computer
- In your Downloads folder, run the sync-installer.exe program
- You will be prompted to allow Sync to install software on your computer. Click Yes or Run to continue
- Next, select the Use an existing account option and click Next
- Enter your email (username) and password then click Next
- Select the location on your computer where you want your Sync folder to be created. If you’re not sure, don’t fret! You can change this later.
- Enter a Device Name which can allow you to easily identify your computer. This is helpful if you have Sync installed on multiple devices.
- Click Next
- Click Finish. You should now have Sync on your computer!
For Mac:
- Download the installer to your computer
- In your Downloads folder, run the Sync.dmg program
- You will be prompted to allow Sync to install software on your computer. Click Yes or Run to continue
- Next, select the Use an existing account option and click Next
- Enter your email (username) and password then click Next
- Select the location on your computer where you want your Sync folder to be created. If you’re not sure, don’t fret! You can change this later.
- Enter a Device Name which can allow you to easily identify your computer. This is helpful if you have Sync installed on multiple devices.
- Click Next
- Click Finish. You should now have Sync on your computer!
Links can be generated by folder or individual files through both the web panel and desktop app.
Web Panel:
- Sign into the web panel
- Hover your mouse over any file or folder then click the Share button
- Select Share as a link option or Manage Link option if the link has already been created
- Click Copy then send the link to the person you want to give access to.
Desktop App:
- Navigate to your Sync folder. If you don’t remember where it is, you can click the sync icon from the bottom-right corner of your screen (top-right on Mac) then select Open Sync Folder. It should open a new window with your Sync folders.
- Right click on any folder or file
- Select Create a link from the menu
- The link will be automatically copied. You can then send it to the person you want to give access to.
When sharing a link to a file or folder, the user can set user permissions to control who can view the link and what they can do within the folder. These settings are only available in the web panel.
Adding Passwords to shared links:
- Sign into the web panel
- Click the ellipsis icon (…) beside any file or folder to open the file menu
- Select Manage Link option or Share as link if the link has not been created
- Click the Link Settings icon
- Enter a password in the text box
- Click the Save Settings button
- Once saved, you can send the link and password to the person you want to give access to. Once you have a set password, everyone who tries to access the link will be required to enter a password.
Changing or removing passwords:
Follow the steps you used to create the password. To remove the password, simply delete the current password then save.
Remove Link (Revokes all external access):
- Sign into the web panel
- Click the Sharing tab from the top menu
- Select Links tab
- Click the ellipsis icon (…) beside the link that you want to disable
- Select Delete Link
- Click Delete Link to confirm. Once the link is deleted, there is no way to re-enable the same link. To share the file or folder again, you would have to generate a new link.
- Sign into the web panel
- Click the ellipsis icon (…) beside any file or folder to open the file menu
- Select Manage Link option or Share as link if the link has not been created
- Click Link Settings button
- Click the calendar icon beside the Set expiry date box.
- Pick an expiry date
- Click the Save Settings button. Once saved, you can send the link to the person you want to give access to. Expired links can be re-activated by changing the expiry date.
Once the linked folder or file is renamed or moved, the link will stop working. To continue to share it, a new link must be generated or you can restore the file or folder to its original location.
Deleting a local file will delete the file remotely as well. If Sync is taking up too much of your storage space, the desktop app lets you control which folders within your Sync get downloaded to your computer.
Selective Syncing:
- Click the Sync icon from the bottom-right toolbar (top-right on Mac)
- Click the Settings icon (gear icon)
- Select Preferences
- Click the Advanced tab
- By default, all folders are checked, which means that all folders are downloaded to your computer. Uncheck the folders that you don’t want downloaded.
- Click Apply
The Sync desktop app automatically keeps your files and folders synchronized and up-to-date. The app will display overlay icons on files and folders which signifies the syncing status.
Overlay Icons:
These icons are displayed on all Sync files and folders:
![]() In sync – means the file or folder is finished syncing (backed up to the cloud) and is up-to-date
In sync – means the file or folder is finished syncing (backed up to the cloud) and is up-to-date
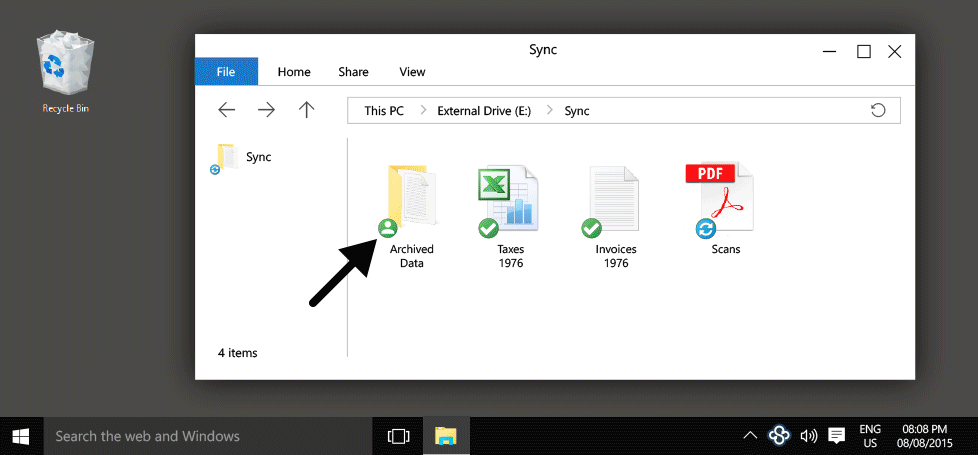
![]() Shared – means that the file or folder has been shared as a team shared folder or a link and is up-to-date
Shared – means that the file or folder has been shared as a team shared folder or a link and is up-to-date
![]() Sync in progress – means the file or folder is in the process of syncing
Sync in progress – means the file or folder is in the process of syncing
![]() A file or folder isn’t syncing – means that the file or folder is not syncing. This can occur if you have selective sync or if the file name contains invalid characters. The progress bar may provide more detail.
A file or folder isn’t syncing – means that the file or folder is not syncing. This can occur if you have selective sync or if the file name contains invalid characters. The progress bar may provide more detail.
![]() Error – unable to sync file or folder. This can occur when you’ve used up all your Sync storage (can’t upload), if your computer storage is full (can’t download), or if there is a technical issue that prevents it from syncing.
Error – unable to sync file or folder. This can occur when you’ve used up all your Sync storage (can’t upload), if your computer storage is full (can’t download), or if there is a technical issue that prevents it from syncing.
Sync Status Icons:
You can find these icons when you click the Sync icon on the bottom-right corner (top-right for Mac).
![]() In Sync – all files in your Sync folder is backed up in the cloud and is up-to-date
In Sync – all files in your Sync folder is backed up in the cloud and is up-to-date
![]() Indexing – files are being transferred or indexed, Indexing is the app’s way of verifying that all files are in sync.
Indexing – files are being transferred or indexed, Indexing is the app’s way of verifying that all files are in sync.
![]() Paused – the sync app is paused and is not running. Click the icon and select Resume.
Paused – the sync app is paused and is not running. Click the icon and select Resume.
![]() Error – unable to sync files and folders. This can occur if the internet gets disconnect or if you don’t have any more storage space.
Error – unable to sync files and folders. This can occur if the internet gets disconnect or if you don’t have any more storage space.
This will remove Sync from your computer. Do not delete any folders before doing this.
- Click the Sync icon from the bottom-right toolbar (top-right on Mac)
- Click the settings icon
- Select Preferences from the menu
- Select the Account tab
- Click the Uninstall button and follow the prompts
For Windows: https://sync.com/download/sync-uninstaller.exe